
The prime function of giving an IP address to a system while connecting to the internet is to track the location and to distinguish it from other systems connected to the internet. Further, the IP addresses are divided into two types one is dynamic which keeps on changing every time the system is connected to the internet. The other type is the static IP address; from the name, it can be understood that it doesn’t change, unlike the dynamic IP.
There are four ways to configure/set static IP address on Ubuntu and today we are demonstrating these on Ubuntu 24.04.
Outline:
How To Configure Static IP Address on Ubuntu 24.04
The use of static IP addresses holds significant importance when a device has to be accessed from the internet if the IP is changing then the host system will be unable to connect. Normally static IP addresses are used in applications where server hosting, remote access, and accurate geolocation are required.
1: Through GUI
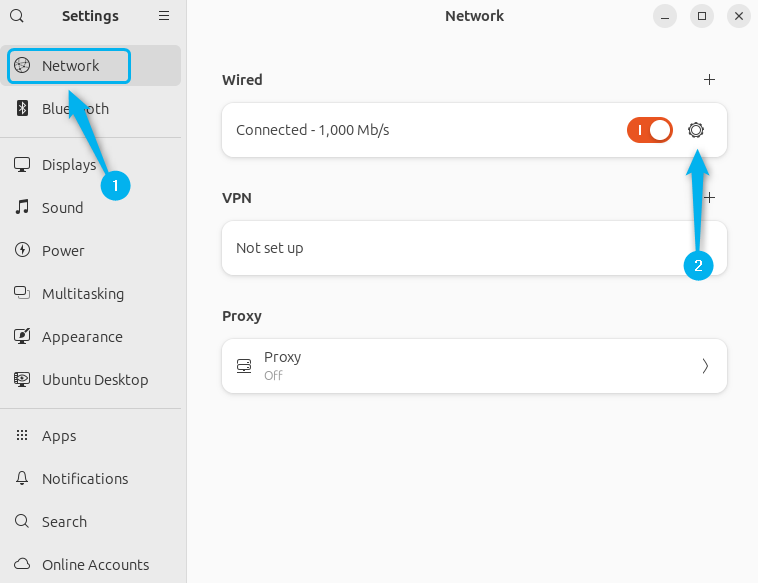
One of the simplest ways to configure Ubuntu 24.04 static IP address is by using network settings. First, go to your wired or wireless connection settings in the network tab under the settings app:
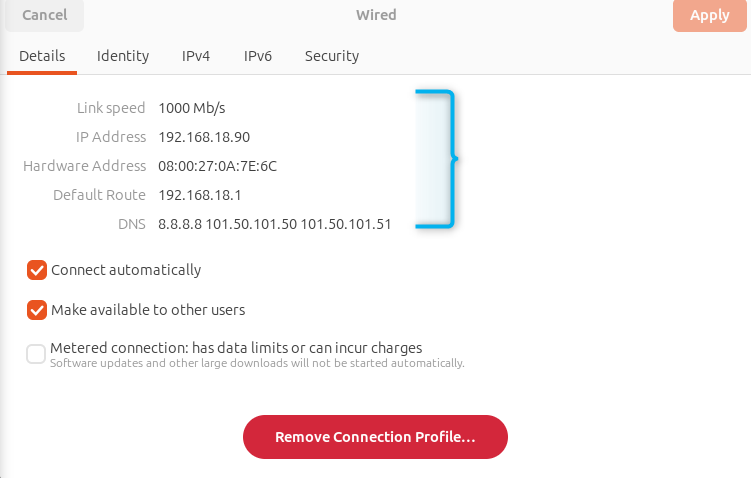
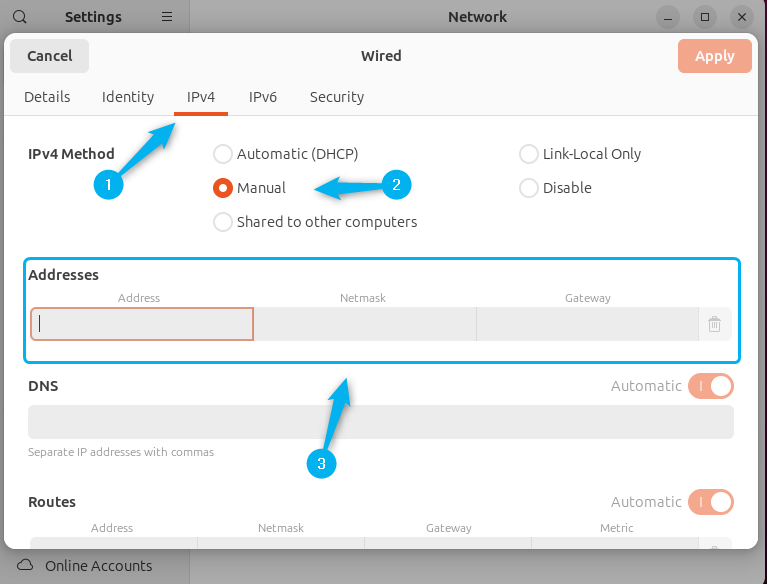
Now, in the details tab, check for your current IP address and subnet mask, afterward, you go to the IPV4 tab and choose the manual method from there.
Next, write the desired IP address that is in the range between 1 to the broadcast IP address.
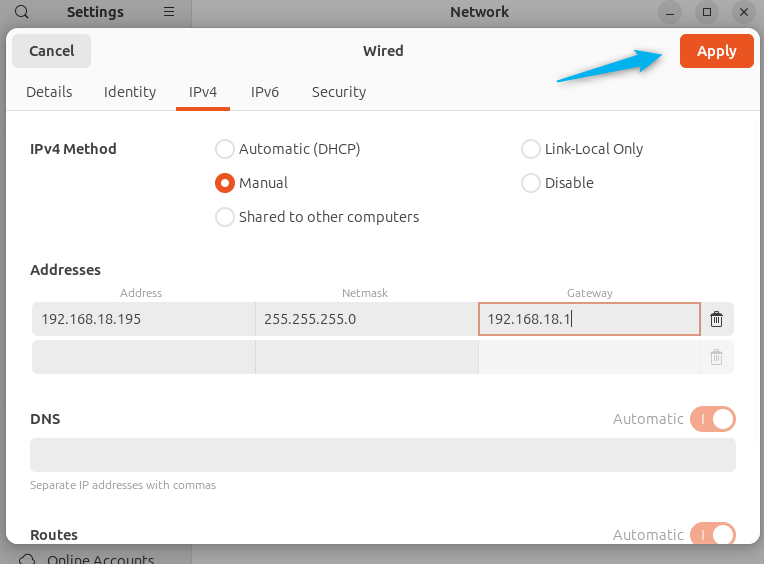
Here, in my case, the last system on this network can have the IP address 192.168.18.255, now once you are all set, verify the addresses and click on Apply to save the changes:
Now verify the changes in the details tab:
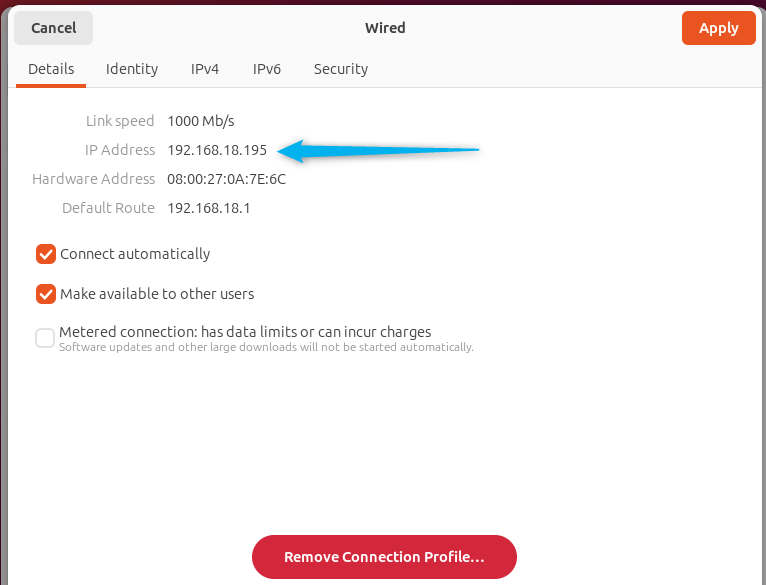
So this is how you can set the static IP address for Ubuntu using its graphical interface.
2: Through Netplan Utility
The Netplan is a command line utility that was developed for the purpose of simplifying the process for the configuration of networks in Linux systems. It provides the network configuration abstraction from the two backends also named as renderer in Netplan terminology.
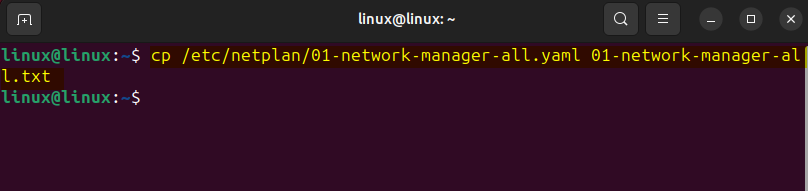
These two backends are named as network and network manager. So first copy the original file in the same directory by just changing the file extension from yaml to text:
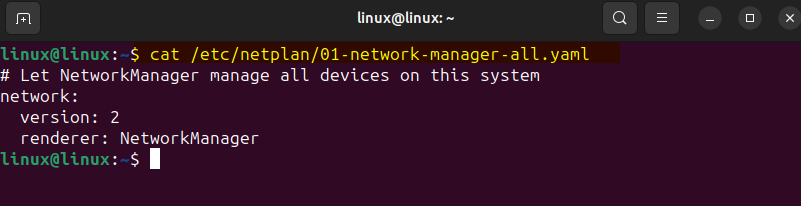
The Netplan allows the users to create a file in a serialization language known as YAML. In this file there is a description of required network interfaces and their desired configuration. So, to configure the static IP address in Ubuntu using Netplan you need to set configuration by yourself for the specified connection. To begin with writing the file first read the contents of this file and check with render and version is already being used:
Now create a new YAML configuration file using any file editor in the netplan directory by executing:
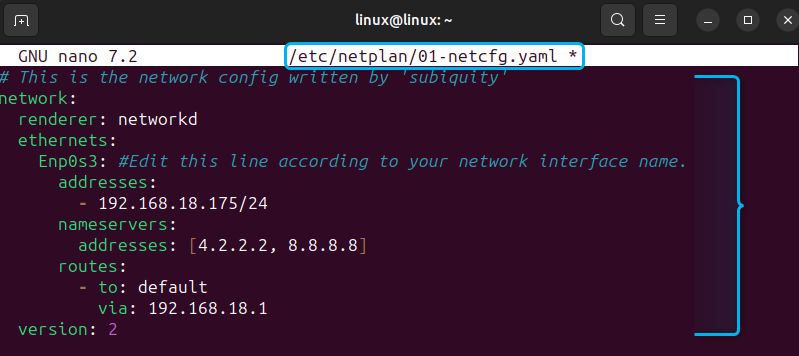
Next, copy and paste the code line given below in the file and set your connection name, renderer name along with the desired static IP, gateway and connection name:
network:
renderer: networkd
ethernets:
Enp0s3: #Edit this line according to your network interface name.
addresses:
- 192.168.18.175/24
nameservers:
addresses: [4.2.2.2, 8.8.8.8]
routes:
- to: default
via: 192.168.18.1
version: 2
Note: While copying the code ensure the version is 2 and the render name is correct otherwise the changes for the static IP address will not be applied.
Once the code is pasted then review the changes and save the file:
Next, apply the network changes:

As in the image above, you can see that there are multiple warnings and all are about the permissions for the configuration file created previously so to get rid of then change the file permission by executing:
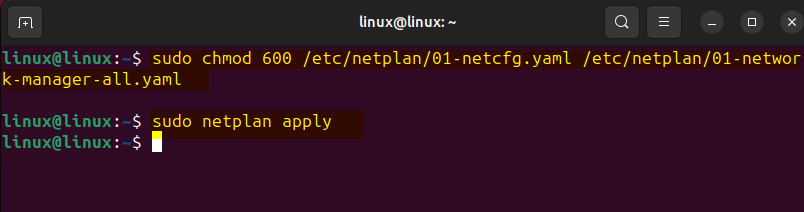
Now again apply the changes and verify if the static IP address is changed by executing:
3: Through nmcli
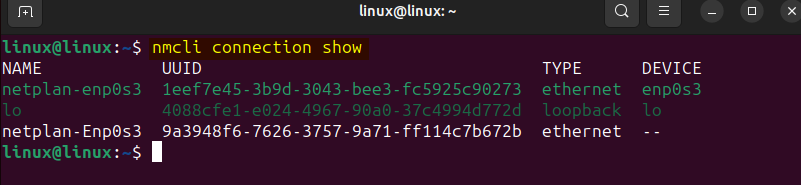
To configure static IP address on Ubuntu 24.04 there is another command line tool or utility named as nmcli. The nmcli primarily controls the network settings. So to begin with the configuration of the static IP address on Ubuntu first check the list of network connections and for that execute:
Or
nmcli connection show
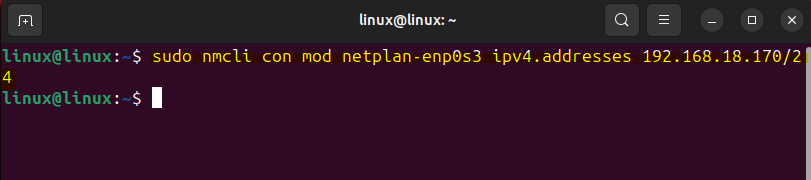
Now first set the desired IP address by stating the connection name along with the port that your system is using, Here my system uses port 24 of the router, use the following syntax for setting the static IP address:
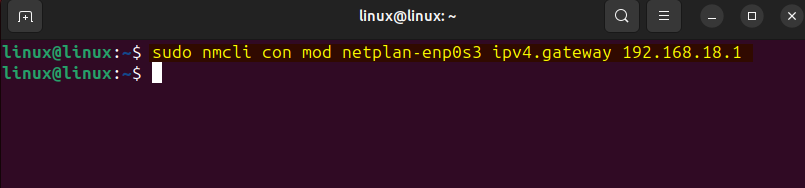
Next, set the gateway IP which serves as an access point for the system to connect the internet, for this static IP and use the following syntax for it:
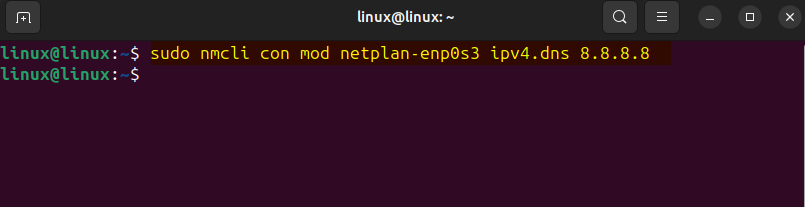
The domain name server is also required to configure the static IP address on Ubuntu, it is necessary because it translates human-friendly domain names into IP addresses. To set the DNS for a static IP address, use the following syntax:
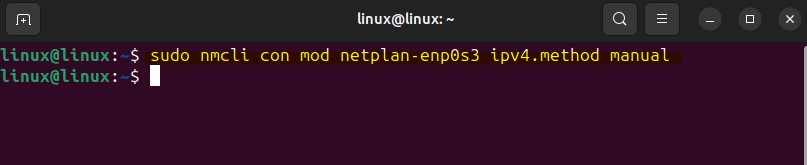
Next, modify the configuration method for Internet protocol version 4 to manual, this way you can change the IP address, subnet mask, gateway, and DNS server for a specific connection:
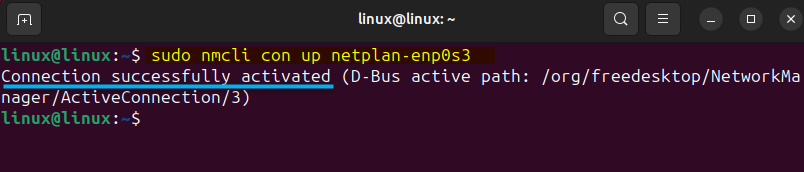
Now once you have entered all the details for the configuration of the static IP address, activate the connection by using its name along with up command:
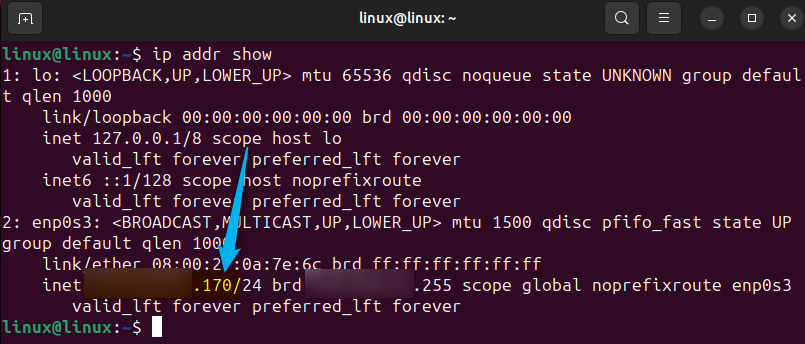
Next, to verify the change in the IP address, check the current IP address by executing:
4: Through nmtui
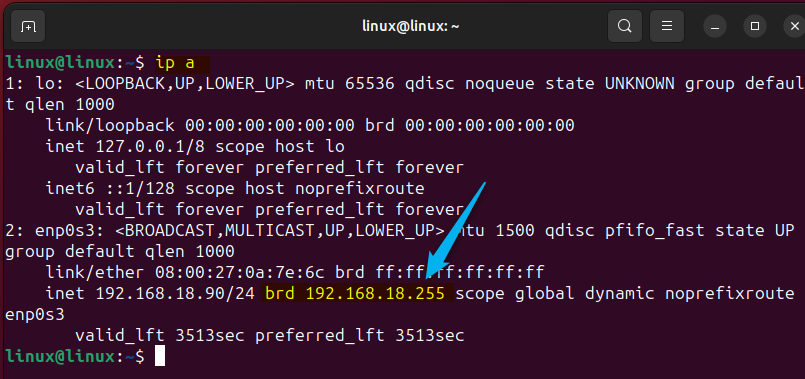
The network manager text user interface utility can also be used to configure the IP address of Ubuntu to static. It’s a user-friendly command line tool for Linux operating systems that are primarily used for network configuration. To begin with the process of configuring the static IP address on Ubuntu first look for your broadcast IP which in my case is 192.168.18.255:
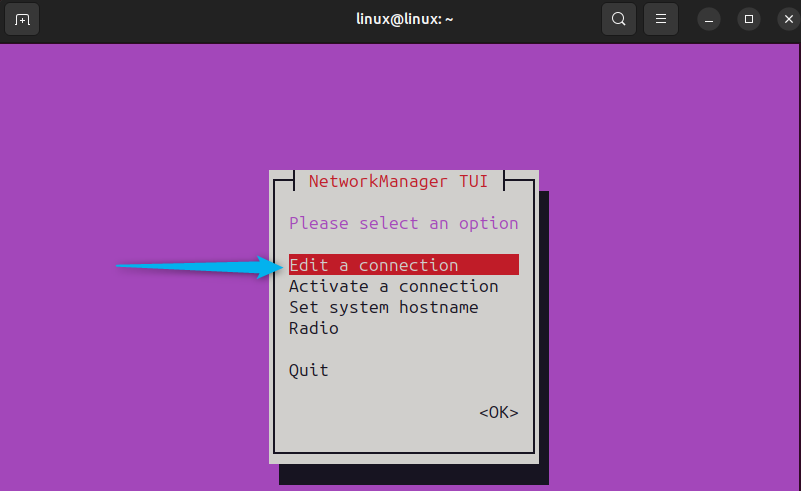
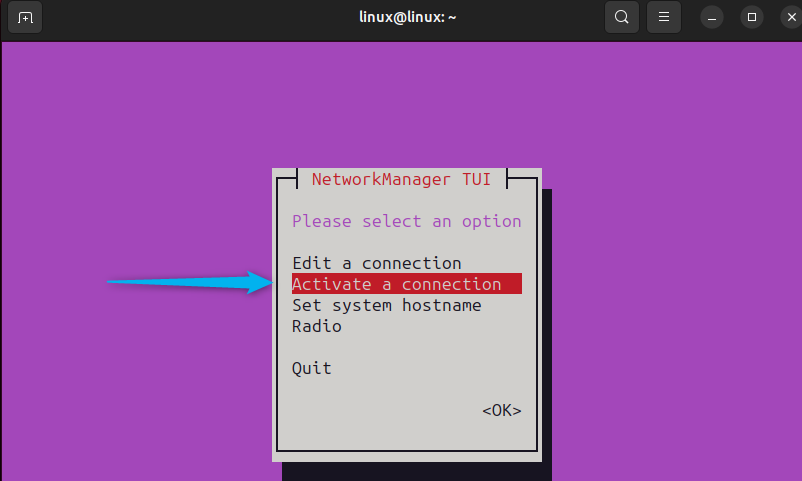
Now run this nmtui utility tool by executing the below command and as a result, a small menu will appear:
Here now click on the Edit a connection option to set your desired static address:
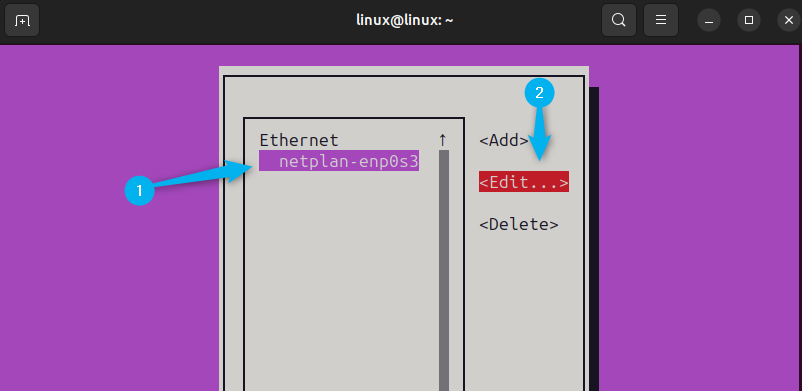
Now here select the connection appears on the list on the left and then select edit:
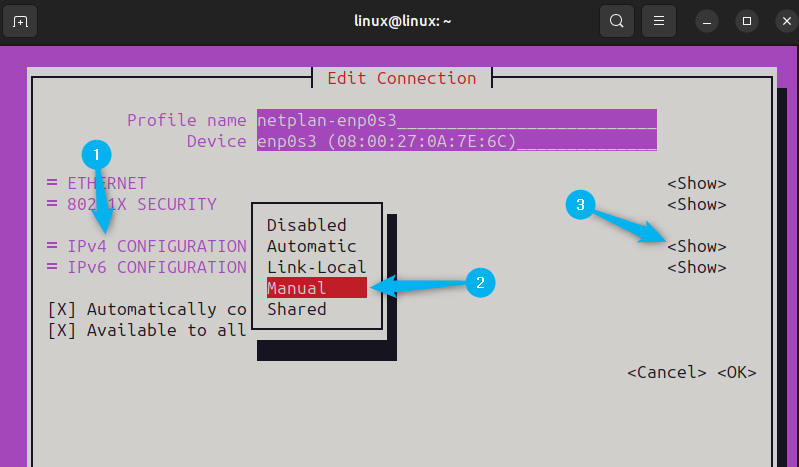
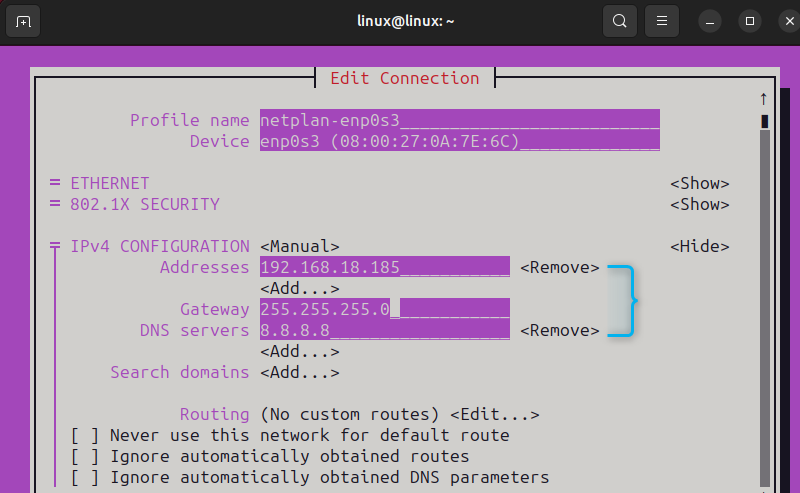
Now move to the IPv4 CONFIGURATION option and select Manual, afterward move the cursor to the Show option to set the static IP address:
Now here set your DNS servers and Gateway followed by the IP address, once you are done move back to the initial menu:
From the initial menu now click on Activate a connection:
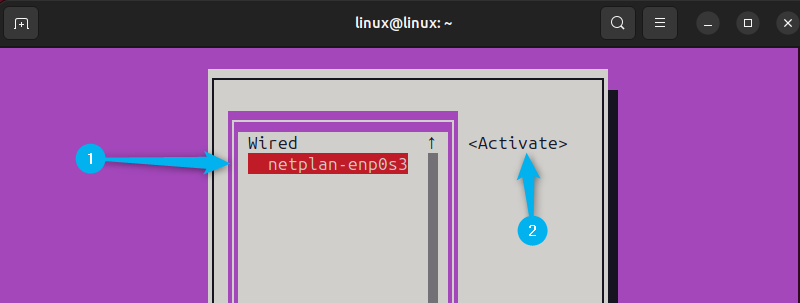
From there select the same network connection and click on activate, this will set your desired IP address as static:
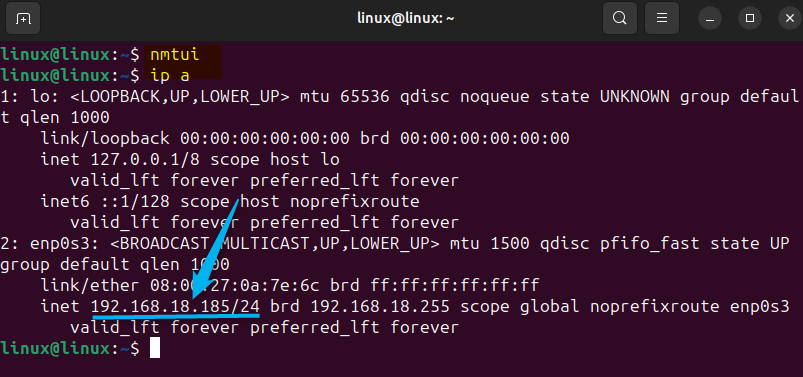
Now to verify the changes, check the IP of your Ubuntu by executing:
Conclusion
Setting up the static IP address is beneficial for the systems when they are to be accessed remotely or they have to be connected to any network back and forth automatically. To configure static IP address on Ubuntu there are four ways which include using the system network settings through its graphical interface, netplan, nmcli, and nmtui utility. The recommended way for configuring the static IP address is through Ubuntu GUI because it is the easiest method among all.
I’m Aaliyan javaid, an electrical engineer and a passionate tech enthusiast. I have been working with embedded systems, programming, and Linux operating systems for over 2 years. I love to explore new technologies and share my knowledge and experience with others.